The Grid

The Grid is a popular and powerful plugin for creating galleries. Some might even say that with this plugin you have unlimited options for creating galleries anyway you want. We have included this powerful plugin in the theme so you can create the best galleries on your site. Here, we will explain anything and everything about it; from importing to developing a Grid.
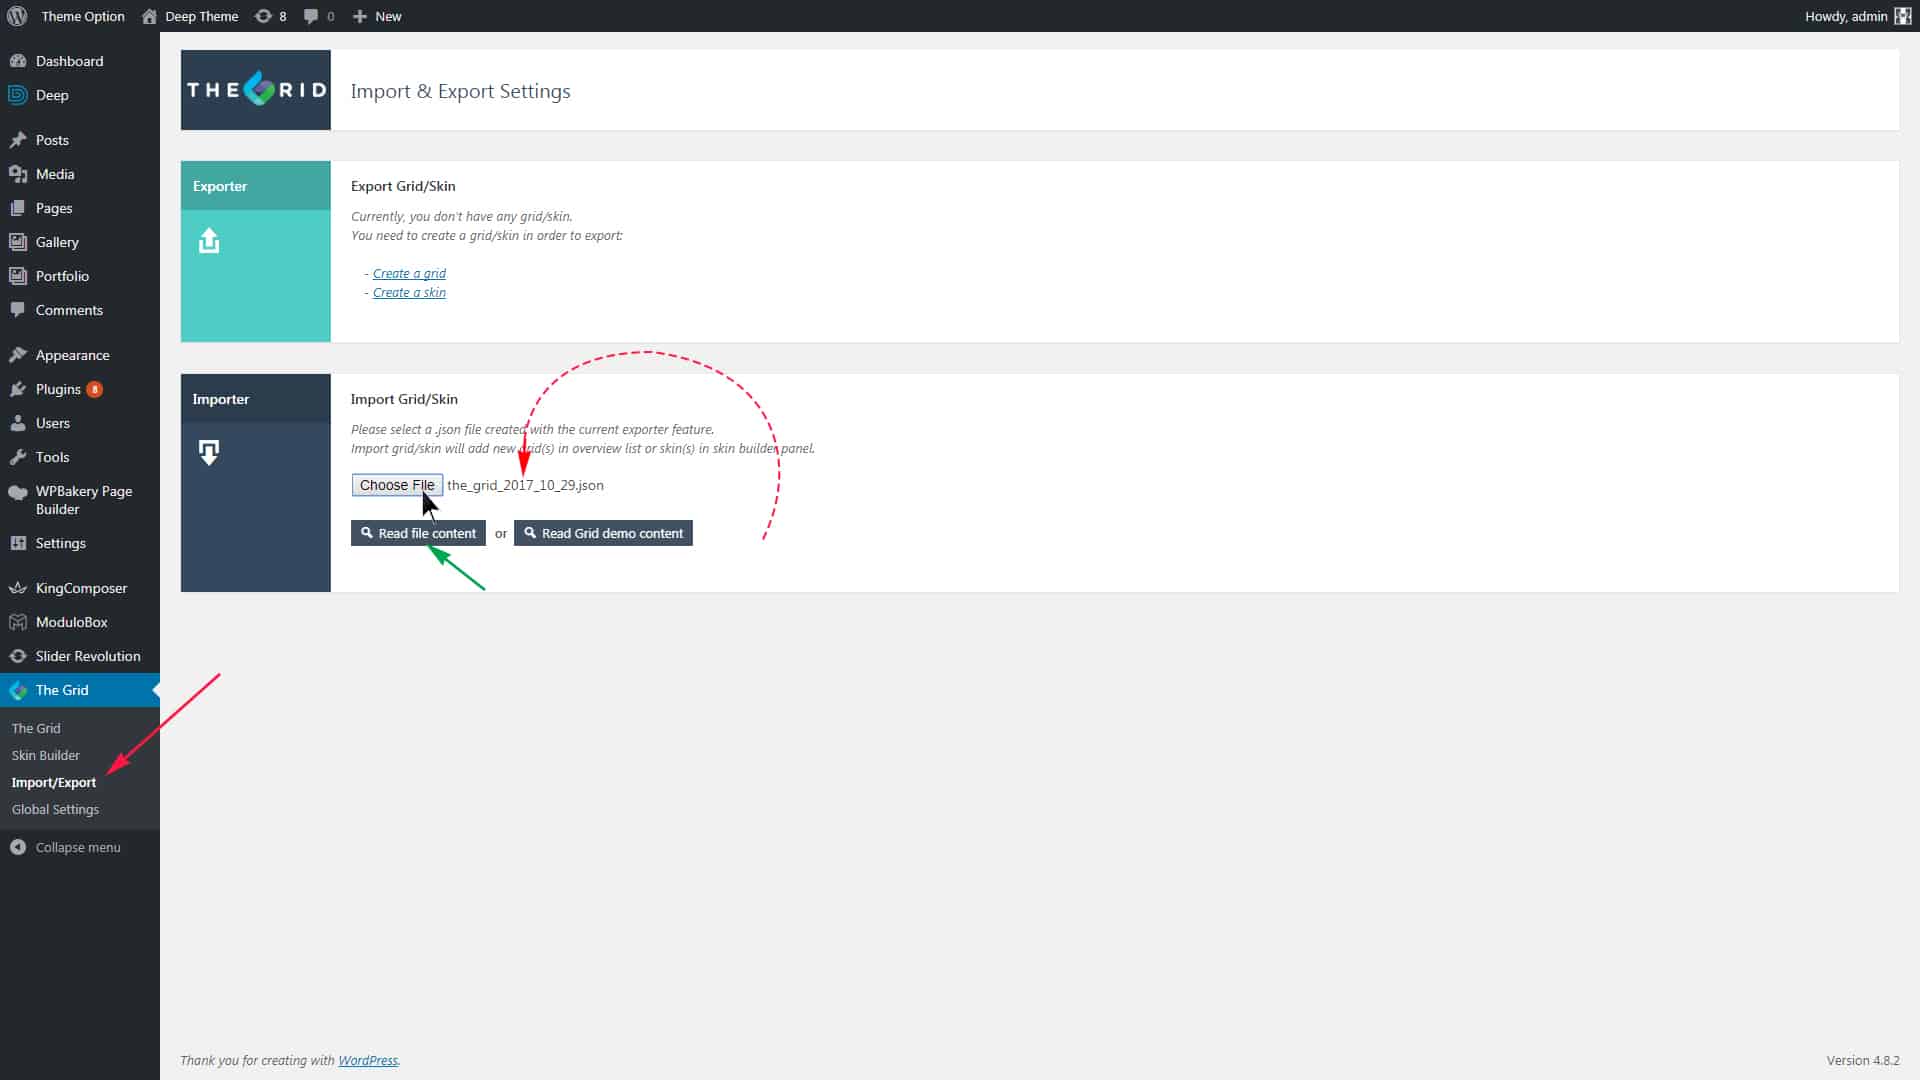
To start, install The Grid via the link below. After activating the plugin, go to WordPress Admin > The Grid > Import/Export.
Go to the DummyContent folder which you have downloaded. There is a file with the format “.json” called TheGrid. Drag this file to the spot marked in this image.
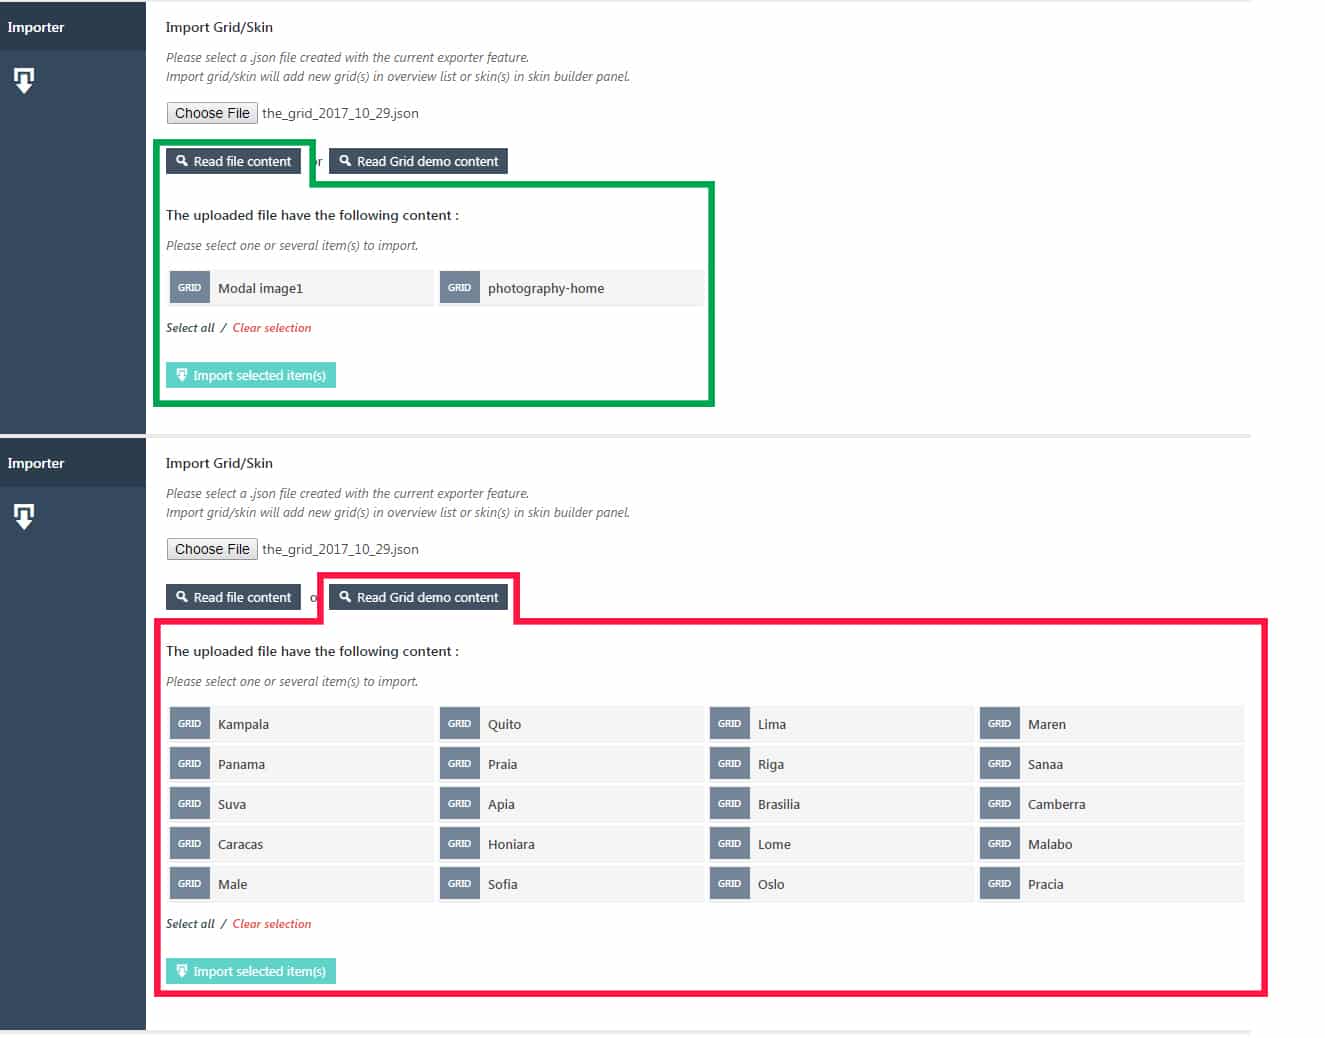
If you click on the green arrow, it will show the content which you have dragged and if you click on read Grid demo content it will show the default content of the plugin. We have shown this in the following image.
Click Import Selected item(s).
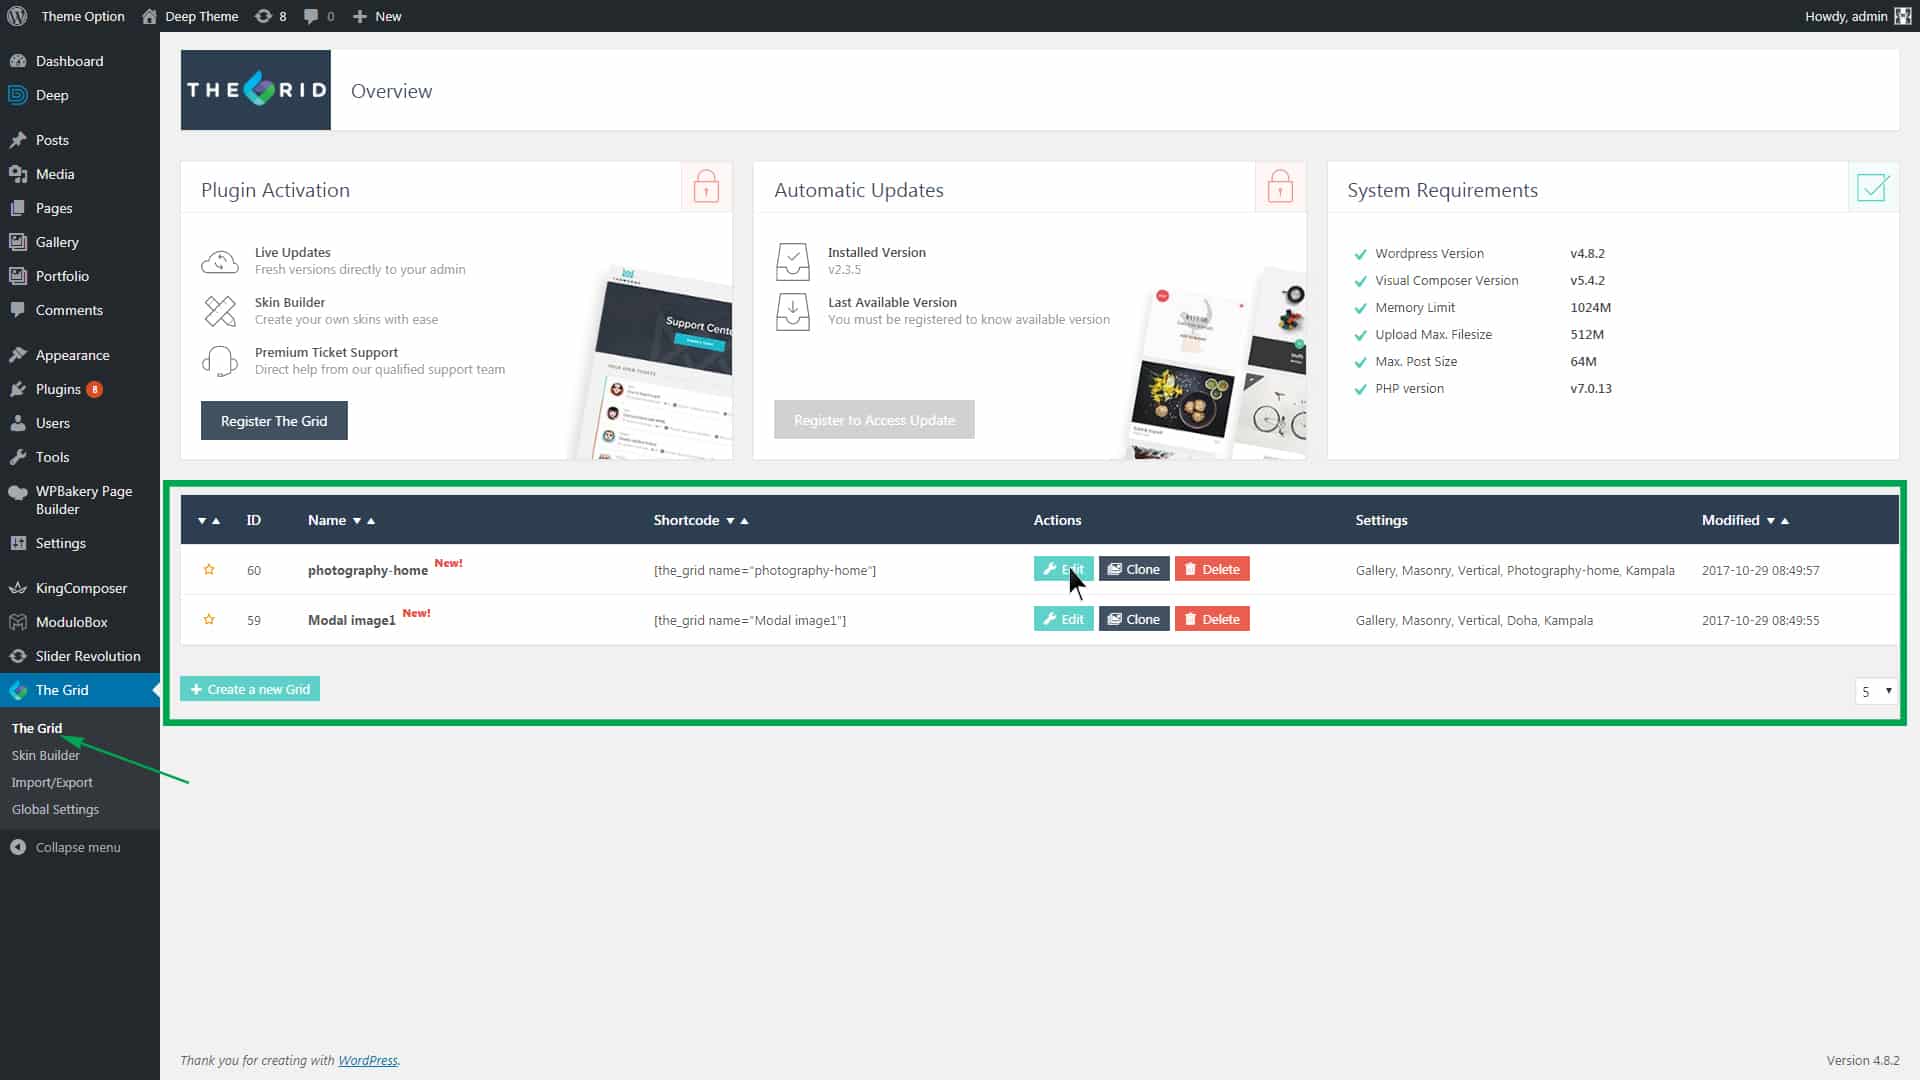
After importing, go to The Grid submenu and here you can see the items that you just imported. Here you can copy the grid and view the shortcodes.
Once you have imported the files, you can see them is shortcode settings. From here you can simply click and view the grid of your choice on the page.
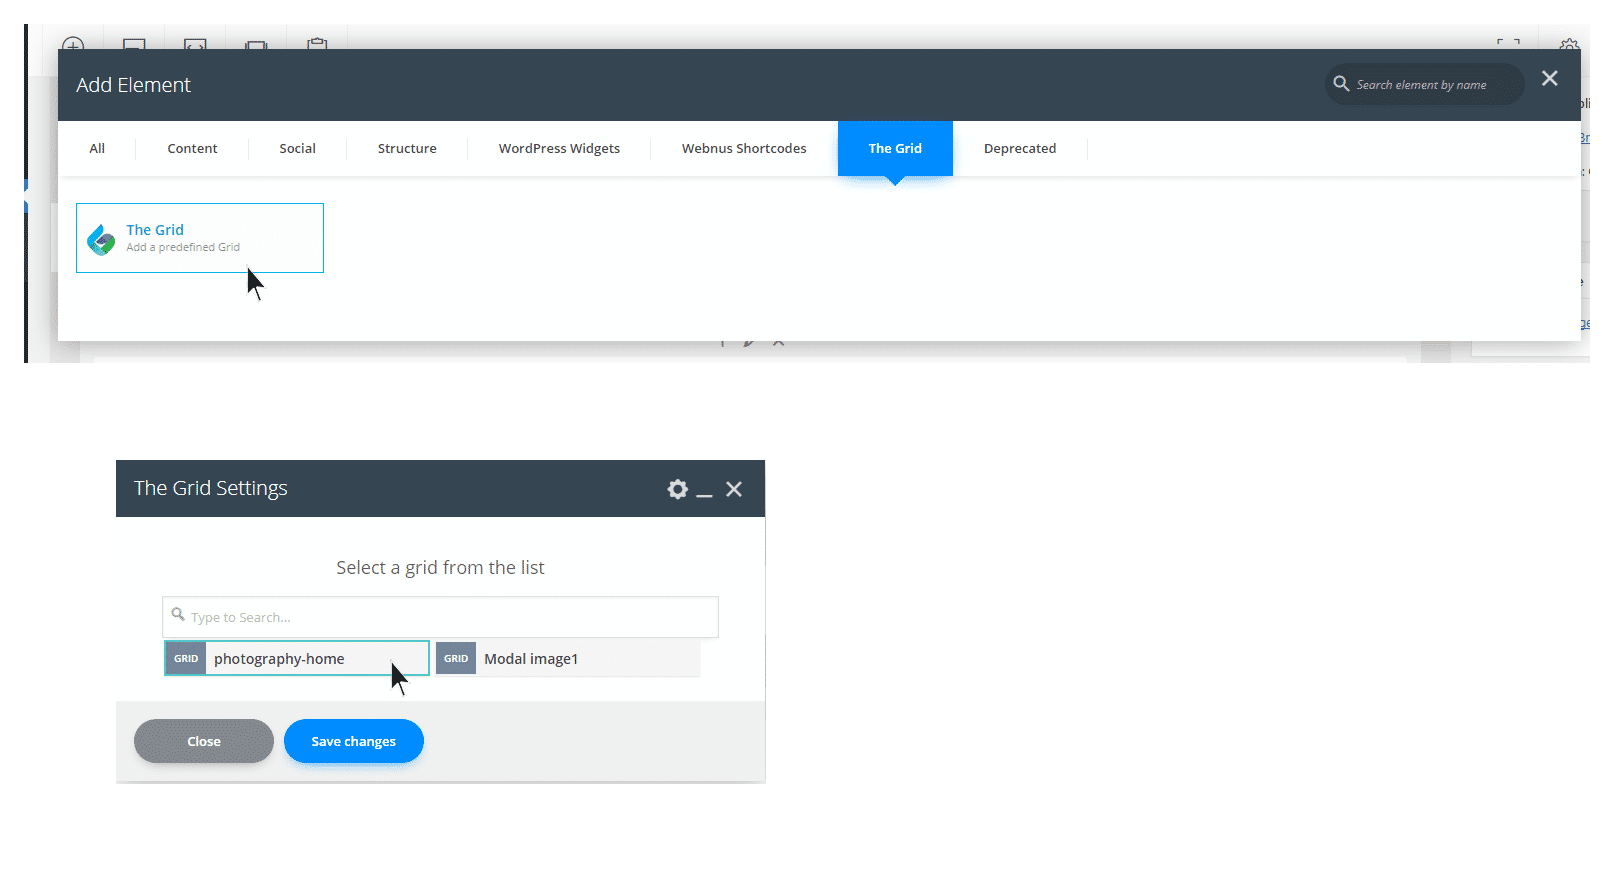
To be able to use the grids which you have created or imported, first, using the article below, create section/row for the page frame. Then, use The Grid shortcode on your page by selecting your desired grid.
To customize the grids, you can use the main documentation of The Grid Plugin.
The Grid general adjustments in Deep Theme
Here we will have a brief introduction to The Grid in Deep Theme. From now on, we refer to your grid of choice as the grid. Go to your grid settings.
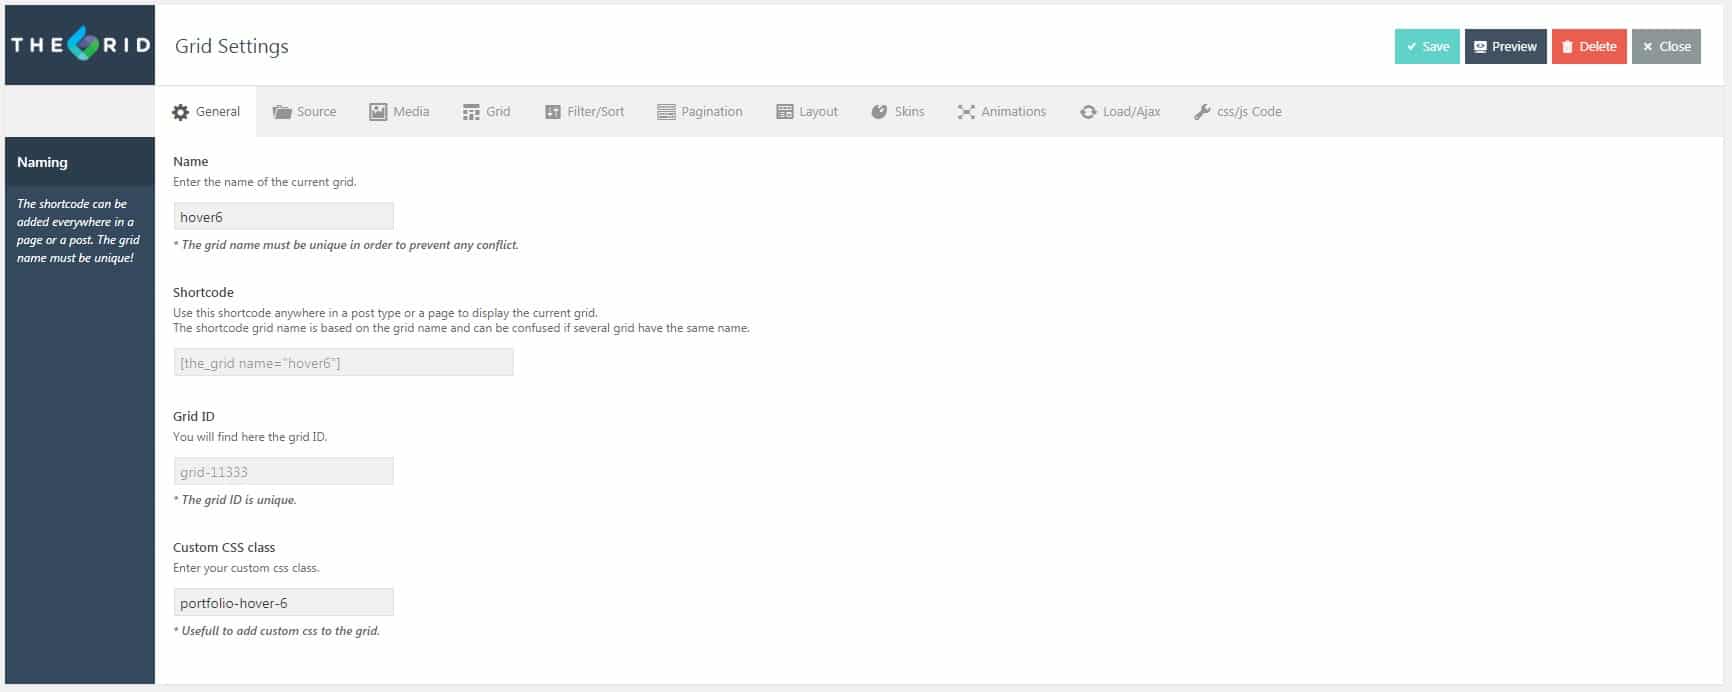
Here are several tabs that you can use for adjustments. The first tab is the General tab, it shows the name, shortcode, class, and grid ID. If you use grids from the theme, please note that in the first tab, General tab, not to change the class within the Custom CSS Class. (If you have made changes, don’t worry, the class of the grid has the same name as the skin of the grid which we’ll talk about later on.)
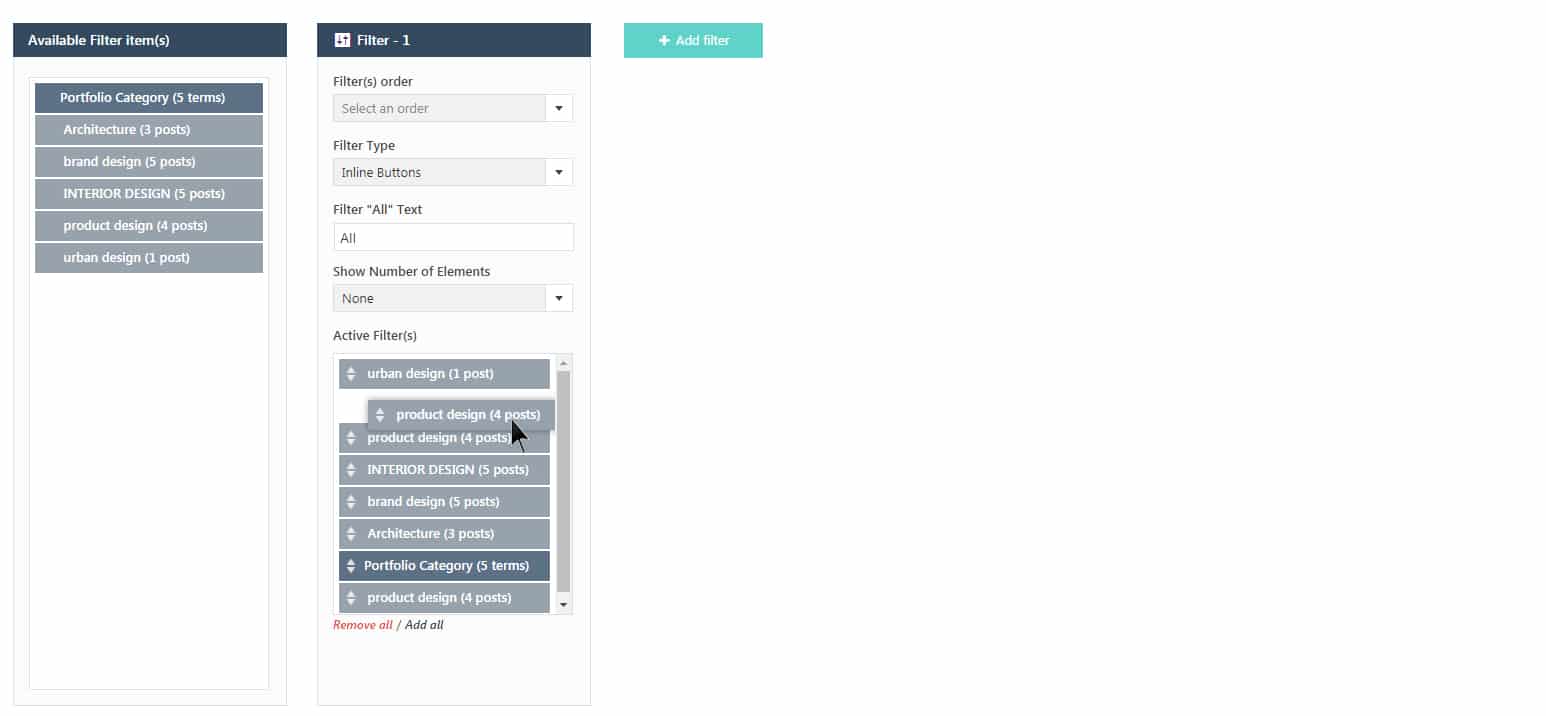
In the source tab you can select your grid’s source type, for example to read from WordPress, Instagram, Youtube, etc. In this part, you can set the order and number of items displayed. Also, it gives you the option to select your post type as multiple or single. You can also adjust the status of your post’s appearance. In Media tab, you can have media adjustments and for the grid tab, you can select the gallery that you are working on to be Grid or Masonery. Alternatively, you can create filter options from the categories you have. Drag and drop from the available categories.
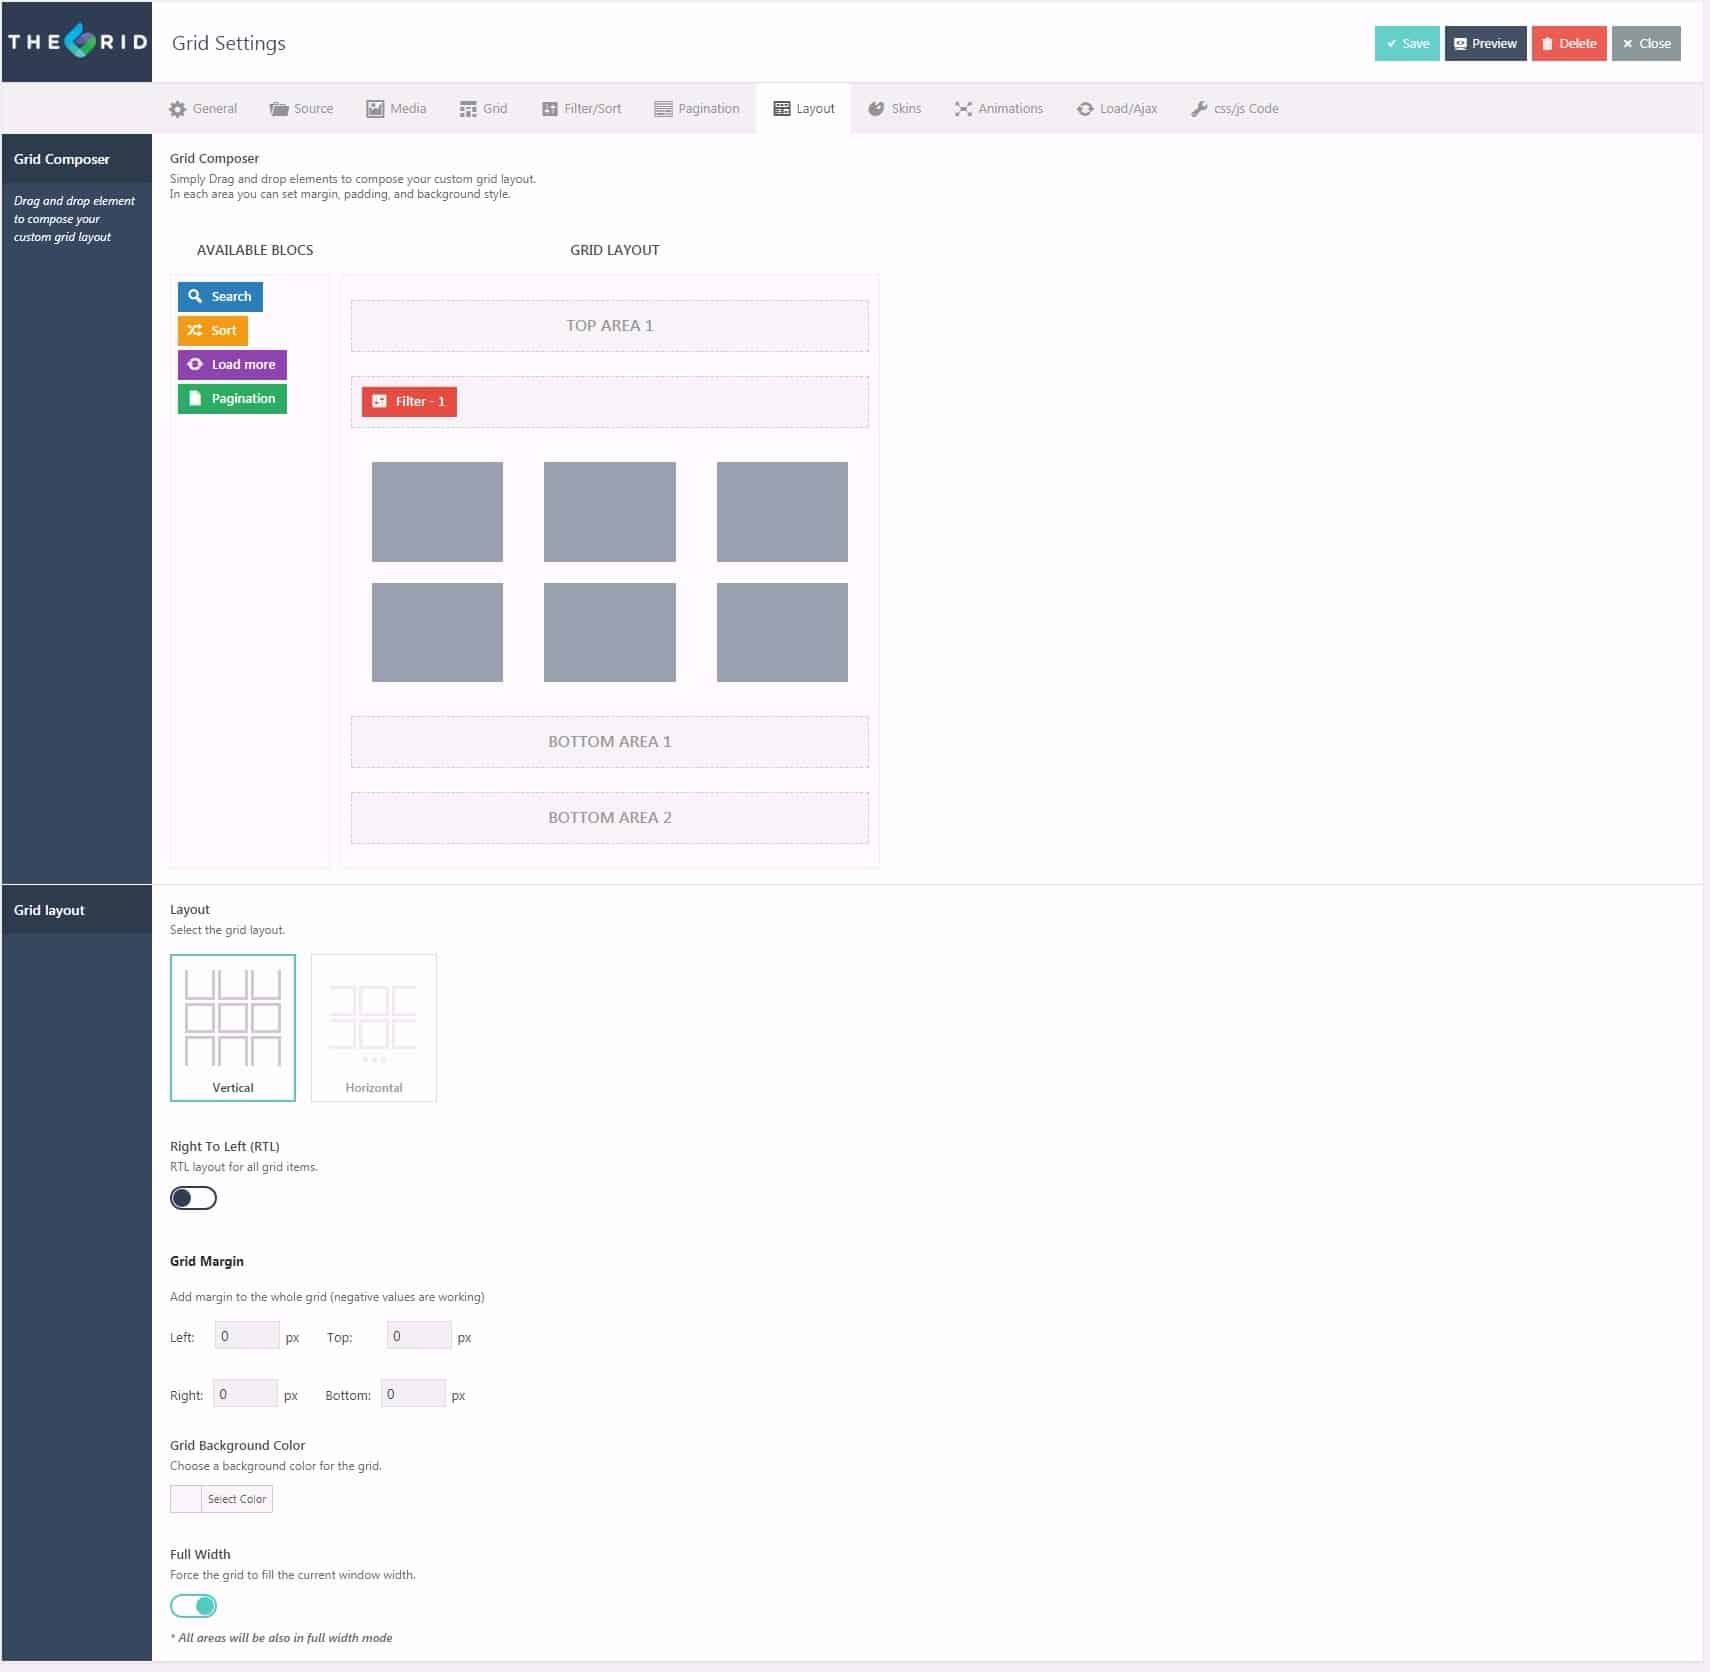
Pagination tab addresses page adjustments. But in Layout tab you can put the filters you have created and load more buttons, search or sort boxes. If you go down, you can adjust the grid layout vertically and horizontally. RTL is also set here plus the margins and full width option.
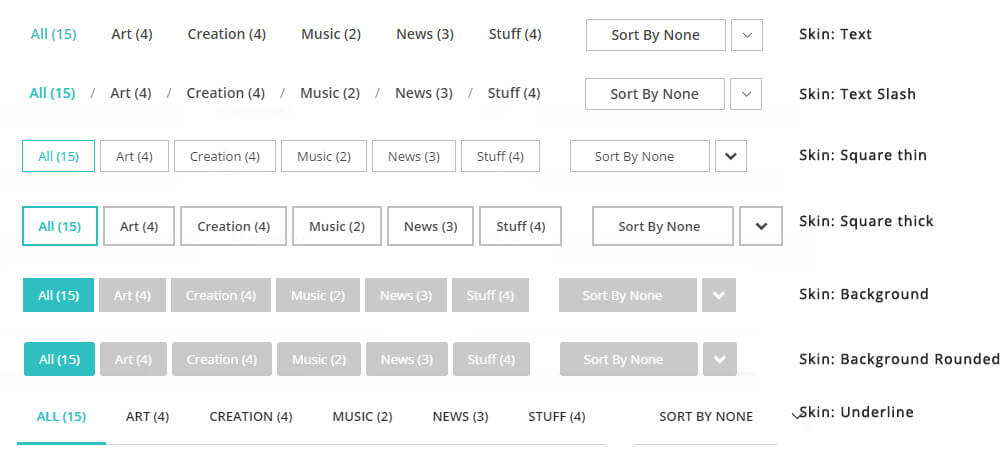
The next tab, developed by our team for Deep, is skin. As you can see in the image below, you can select your preferred skin from here. Keep in mind that the name of your skin must be similar to the class that is set in general tab. Click on Deep category to see a complete list of Deep Theme skins. If you select Grid in the grid tab, 12 skins will be shown and if you select Masonery, 2 skins will appear. In the second section, you can set content background color and overlay background color for the above skin. If some of the background colors for certain skin contents are read from the colors that you have set in Theme Options and they match, the next section is the color for the filter which is shown in the image below.
In the animation tab, you can how grids load. The Load/Ajax tab also adjusts the loading of your gallery before appearing. In the last tab which is CSS/JS Code, you can put the customization codes.
Recommended Posts

How To Setup BuddyPress Demo
June 25, 2018

Other Free Plugins
June 20, 2018

Other Premium Plugins
June 20, 2018
